How to Create Student Groups Directly in Your Seating Chart
April 2026 • 5 min read
Creating a classroom seating chart is one thing, making it actually work for collaboration is another.
A seating chart decides where students sit, but it doesn’t decide how they work together. Many teachers spend time reorganizing groups again and again, or avoid group work altogether because it disrupts the flow of the lesson. Sometimes you just need students to have someone to turn to in order to discuss for a minute, compare answers, or help each other get started. Other times, you want students to collaborate on short tasks that last part of a lesson or a single session. In these situations, constantly creating new groups becomes impractical.
In this article, you’ll learn a simple way to build student groups directly into your seating chart, so they’re always ready when you need them.
Why grouping students often feels like a hassle
In theory, grouping students is simple. In practice, it often creates friction.
- You need students to collaborate
- You pause the lesson to organize groups
- Students move, talk, and lose focus
- The activity ends up feeling inefficient
For longer projects, this might be worth it. But for short discussions, quick tasks, or one-minute reflections? It often isn’t. That’s why many teachers either:
- spend too much time organizing groups, or
- stop using group work as often as they’d like
A simple solution: build partner groups into your seating chart
Instead of creating new groups every time, you can build a simple group structure directly into your seating chart.
This means:
- students already know who they work with
- transitions are faster
- collaboration becomes easier to use in everyday teaching
One of the easiest ways to organize group work is to build it directly into your classroom seating chart.
What are partner groups?
Partner groups are small, fixed groups of students who work together over a period of time. The goal is to give students a predictable structure for collaboration, discussion, and participation, while helping them build connections with more classmates over time.
These groups are built into your seating arrangement and rotate over time, for example, whenever you update your seating chart.
In the next section, we’ll look at three simple ways to use partner groups in your seating chart, from quick discussions to short tasks and social structure.

1. Use partner groups for quick discussions
The simplest way to use partner groups is as your default discussion structure. Instead of organizing new groups for short activities, you can say:
“Discuss this with your group for one minute” or “Compare your answers before we go through it together”
Because the groups are already defined in your seating chart, you can activate the class instantly. You can also use a simple think-pair-share structure:
- Think individually
- Talk to one partner
- Share within the group
- Bring one idea to the class
For many students, this lowers the threshold for participation. They can test ideas in a small group before speaking in front of the whole class.

2. Use partner groups for short collaborative tasks
Partner groups are also ideal for short group activities, without needing to reorganize students.
For example:
- solving problems in math
- short writing or reflection tasks
- practical or hands-on activities
- structured discussions
- station work
- activities outside the classroom
Because the groups are already built into your seating arrangement, you don’t lose time organizing. This makes it much easier to include collaboration, even in lessons where you otherwise wouldn’t.
3. Use partner groups as a social structure
Partner groups can also support the social environment in your classroom.
Students can practice small but important social behaviors, such as:
- Acknowledging each other, simple greetings, eye contact, using names
- Showing interest, ask what they got and how they thought about it
- Including others, invite quieter students into the conversation
- Listening actively, don’t interrupt; respond to what was actually said
- Noticing when someone is left out, pay attention if someone is consistently silent or overlooked
Students are not responsible for each other’s wellbeing, but they can practice noticing and including. Over time, this can strengthen relationships in the classroom.
How often should you change groups in a seating chart?
Groups should last long enough for students to feel comfortable, but not so long that they become static. A simple rule is to rotate groups when you update your seating chart. For many teachers, this means every 3–6 weeks. Over time, this creates variation and helps students build connections with more classmates.
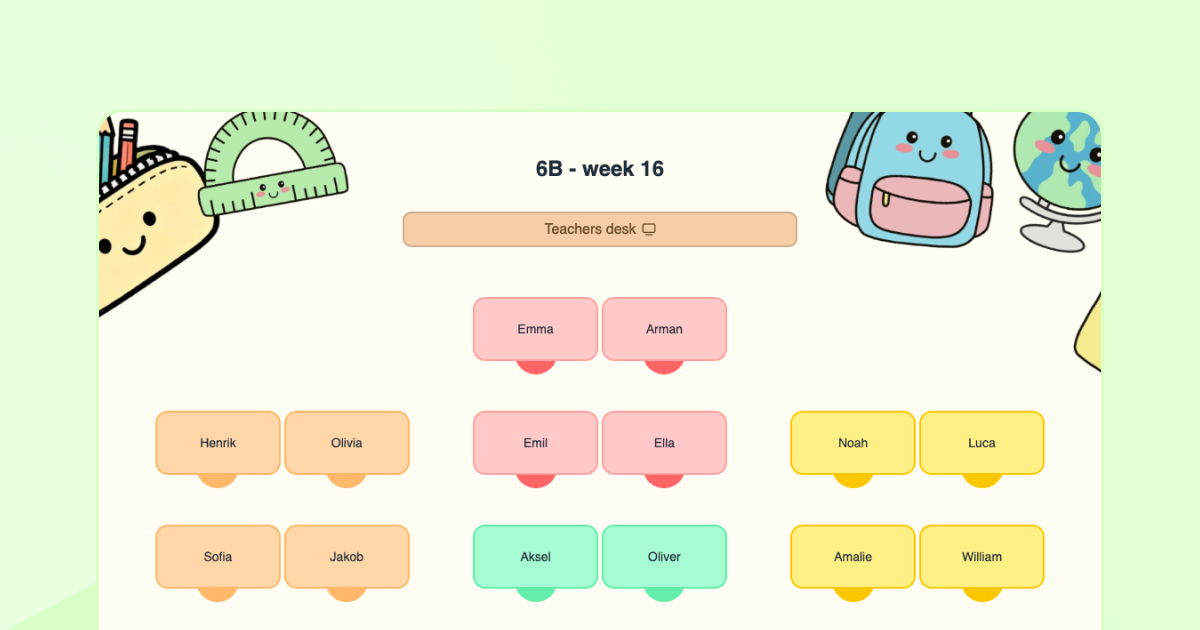
How to create groups in your seating chart
- Create or open a seatsheet
- Use a color tool to mark desks
- Assign the same color to students in the same group
- Rotate groups when you update your seating chart
This makes the group structure clear for both you and your students, without extra organization.
Try it in your own classroom
Partner groups don’t need to be complicated to be effective. Often, it’s enough that students know who to turn to, and that you have a simple structure to rely on. The easiest way to manage this is to build your groups directly into your seating chart. That way, collaboration is always ready, without extra planning.